Author: butcher

Porsche Cayenne Eyebrows installation manual

This manual describes installation process of Porsche Cayenne 955 Eyebrows ( and applies to all Cayenne eyebrows )

You will need :

Eyebrows : Cayenee EYEBROWS

Adhesive – we recommend to use SIKA

Scotch tape

A Helping Hand 🙂

  1. Please do a test fit – you will see that there is a huge gap when you press on one side – don’t worry the material is elastic
  2. Paint the eyebrows
  3. Prepare surfaces for installation ( method differs based from adhesive )
  4. Apply adhesive – DO NOT USE SEALANT
  5. Install eyebrows and fasten it with scotch tape

BMW E46 Blue Diamond

BMW E46 330DA Touring

  • TA-Technix Coilovers
  • CSL Style Add-ons for front bumper
  • Custom Smoked headlights
  • MT2 Front bumper and Yellow tinted fogs
  • Tint

Fiberglass Eyebrows and small fiberglass products installation

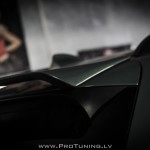
This manual describes installation process of fiberglass eyebrows for BMW E70

The process is similar to and applies to all eyebrows and small fiberglass items such as spoilers, flaps, add-ons and etc

We recommend to use ADHESIVE / HYBRID ADHESIVE such as SIKA FLEX

ATTENTION – do not use sealant – IT’S NOT AND ADHESIVE

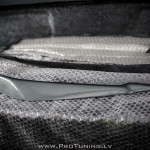
To succesfully install your product you will need

  • adhesive
  • cleaning liquid ( alchohol for example )
  • scotch tape

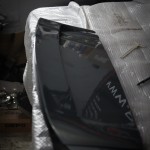
First of all – please examine the received product ! Some minor cratches are allowed due to production ( this is easy covered by a skilled&professional paint job using proper filler )

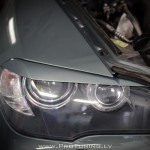
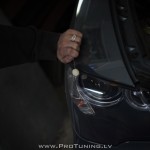
Please do a test fit ! And notice where to apply pressure ( if it is requiered )

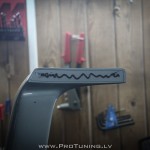
Paint the product, we recommend to use elastificated paint materials to avoid further cracks ( see video belowe for painted spoiler – we can twist the product and there are no scratches/marks – https://www.youtube.com/watch?v=7_9FQ7XpRqQ )

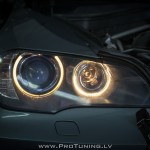
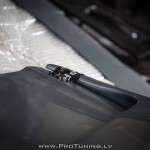
Prepare the surface where the product must be installed to ( in our case it’s a headlight ). Clean it with cleaner and apply primer ( in case of SIKA is used ). Apply primer to product.

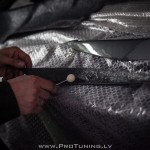
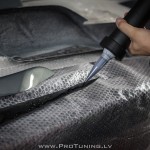
Apply the adhesive to the product, install it to the car and fasten for 24h with scotch tape, after 24h remove the tape and enjoy

Drift Latvia Final Round 2015

« 1 of 2 »

NEZ @ RIGA

« 1 of 3 »

HGK BRUNO MOTO PitBikes

Photoshoot for

HGK Motorsport http://www.hgkracing.com/

BRUNO Moto http://www.brunomoto.lv/

IMG_7202

« 1 of 2 »

Rear spoiler installation – bolt-on system

Our spoilers are supplied WITHOUT any kind of installation hardware – sorry it sometimes can increase shipping price so we decided NOT TO ENCLOSE installation hardware such as adhesive, bolts and etc

Installation of bolt-on spoiler

Firs of all you need to find out which bolt must be used ( mostly it’s so-called 6mm thread )

Take a closer look on the spoiler to find out how much bolts you need ( 2-8 pcs )

Please do a test fit to trunk to see where to drill holes for bolts ( sometimes on cars like VOLVO V-series there are marks for drilling )

Please apply adhesive/sealant on place where spoiler connects to your car’s surface – this must be done to prevent water leaking !

Paint the spoiler !

Install the spoiler and fasten it using bolts/Screws

If you have any questions – feel free to contact us !


BMW E36 Rocket Bunny Style Spoiler

Installed Rocket Bunny style spoiler ( poorly wrapped )

RIVETS USED FOR INSTALLATION

Photo credits : facebook.com/podnebessfoto DPFoto

Installation manual for Bodykit 4.8is – BMW X5 E53 2003-2007 ( facelift )

Installation manual for Bodykit 4.8is – BMW X5 E53 2003-2007 ( facelift ) Bodykit can be found here For installation you will need: 1) Hands 2) Adhesive/glue and a gun 3) Metallic rivets and a gun for it 4) Paper scotch tape 5) Electronic drill to drill correct holes for rivets Front lip installation process Required : 2) 3) 4)…

Continue reading

Translate »