Author: butcher

Chiptuning – наш партнёр, которому вы можете доверять – PowerHunters

Чип-тюнинг “за” и “против”

Оговорюсь сразу – все приведённые ниже факты, цифры и “вычисления мощности” нельзя рассматривать как фактические для вашего конкретного авто т.к. состояние вашего авто мне неизвестно.

Что такое чиптюнинг ? Изначально – перешивка-перепрограммирование блока управления двигателя транспортного средства для повышения мощностных характеристик. Сейчас – отключение дополнительных систем ( DPF, EGR и прочее ), оптимизация расхода, удаление задымления и конечно же прирост мощности.

Зачем – чтобы было быстрее, экономнее и лучше ( как таблетка для похудения ) – всё в одном флаконе НЕ БЫВАЕТ, есть закон замещения – приобретая что-то мы теряем другое пропорциональное приобретенной части.

Надо ли ? Однозначно ДА, а вот теперь рассмотрим логические ЕСЛИ : Если авто полностью исправно : ВСЕГДА перед чиповкой нужно сделать ПОЛНУЮ диагностику авто и устранить неполадки в системах которые будут затронуты ( топливная, наддув и прочее ) , на уставших авто ( особенно дизельных ) чиповка только НАВРЕДИТ вашему авто и испортит вам настроение, по этому перед чиповкой рекомендую проверить машину в PowerHunters и потом её чипануть со скидкой – все расходники должны быть поменяны и вы начинаете ухаживать за своим авто ( 25 тысяч на лонглайфе закоксует любые трубки ). Перед чиповкой желательно заменить масла, фильтра и прочие расходники, для турбо моторов обязательно обратить внимание на систему подачи масла и вентиляции картерных газов.

У кого это сделать по долгу службы мы часто сталкиваемся с фирмами, которые занимаются чип-тюнингом : кто-то пишет дешёвые прошивки и не отдаёт себе отчёт о том что произойдёт с машиной клиента через месяц , кто-то покупает из заграницы стандартизированные прошивки и говорит что это круто – у всех есть минусы и плюсы. Мы нашли лучший вариант – компания PowerHunters осуществляет персональный подход к клиенту и его автомашине. Для вас подберут наилучший возможный вариант чип-тюнинга и прочих услуг.

Мы рекомендуем – PowerHunters ChipTuning – звоните 20449876 и записывайтесь

powerhunters

Fiberglass diffuser installation manual

Diffuser installation manual for AUDI A6 4F :

This Fiberglass diffuser installation manual can also give you inspiration on how to install fiberglass parts which are “a little bit short and i’m a little bit lazy to do something”

Diffuser ( and more other cool stuff for your A6 4f ) can be found here :  http://protuning.lv/index.php?op=market&module=modules/market&id=89&mid=58&model=381&linklang=lv

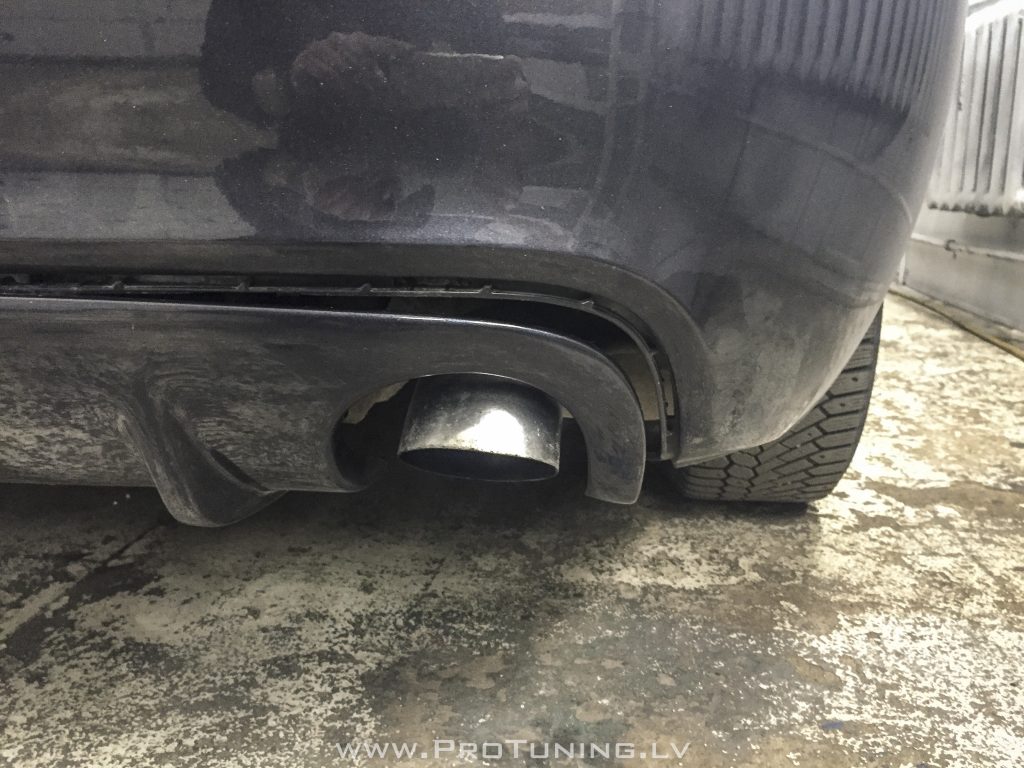
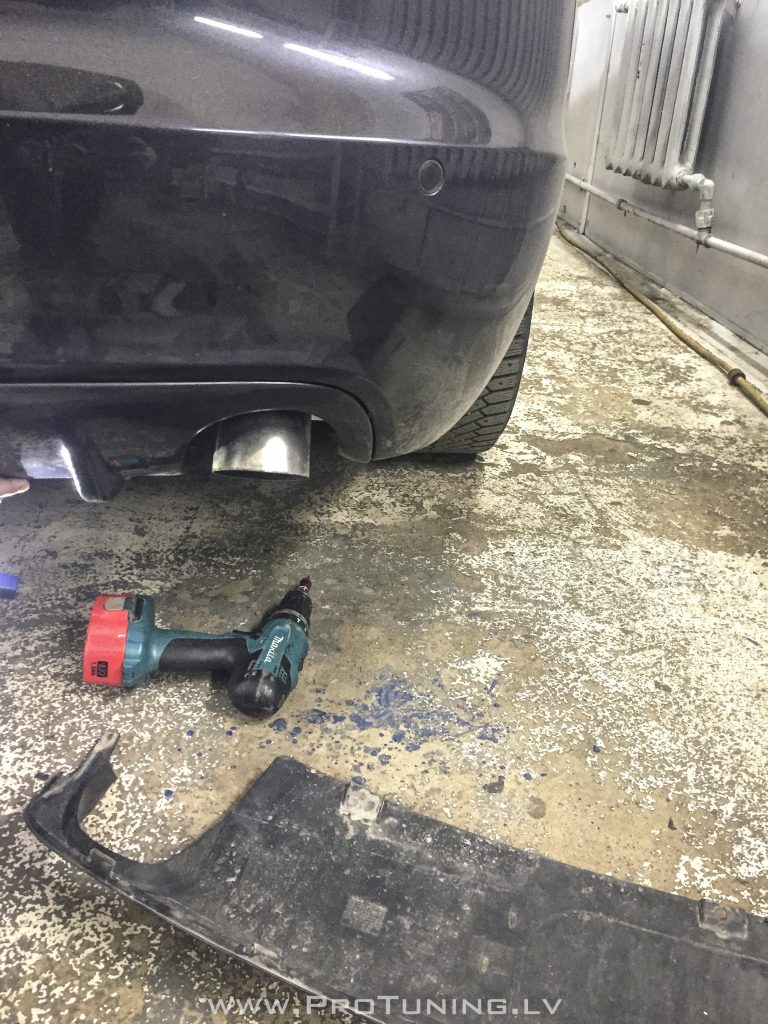
  1. Remove your existing diffuser and note how it is installed on to car ( 4 bolts underneath your car – it’s very important ). For other fiberglass products you need to understand the principles of the installation process – it is all the same.
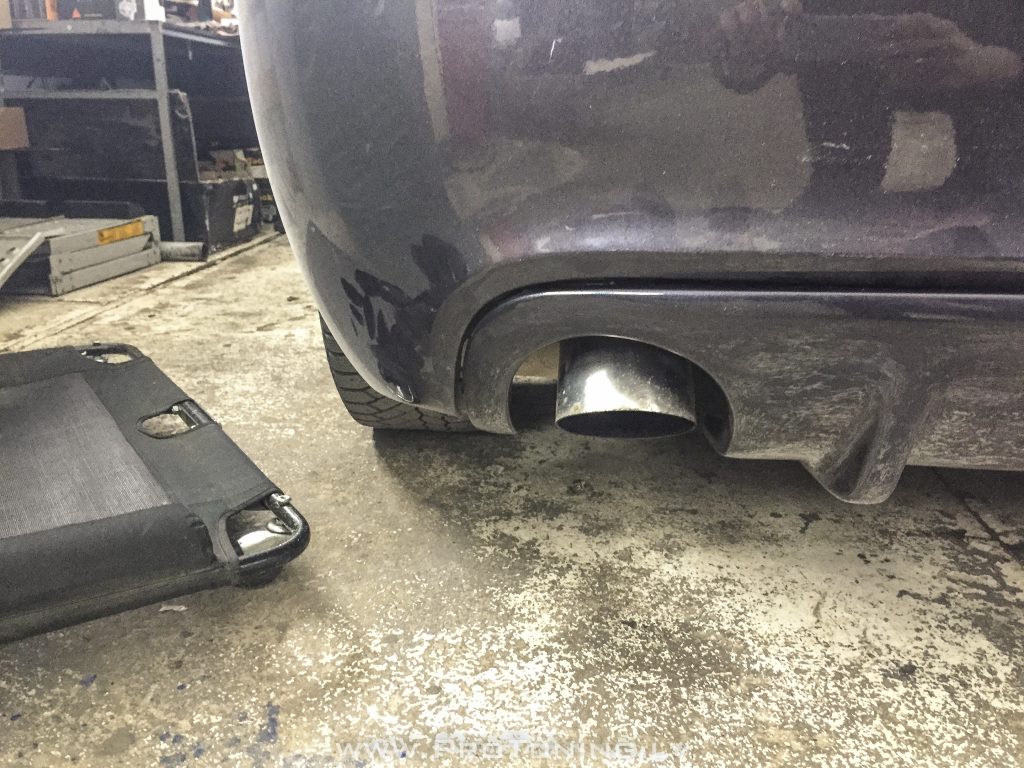
  2. Do a test fit of a new diffuser, it will look a little shorter when not installed – it’s OK – you must understand that fiberglass is elastic material and that not installed product always will look like it’s not suitable.

IMG_6516

3. Starting from one side ( we started from a left side ) fix new diffuser using old screw to the car ( sometimes you need to drill additional hole in the diffuser / fiberglass part )

IMG_6515

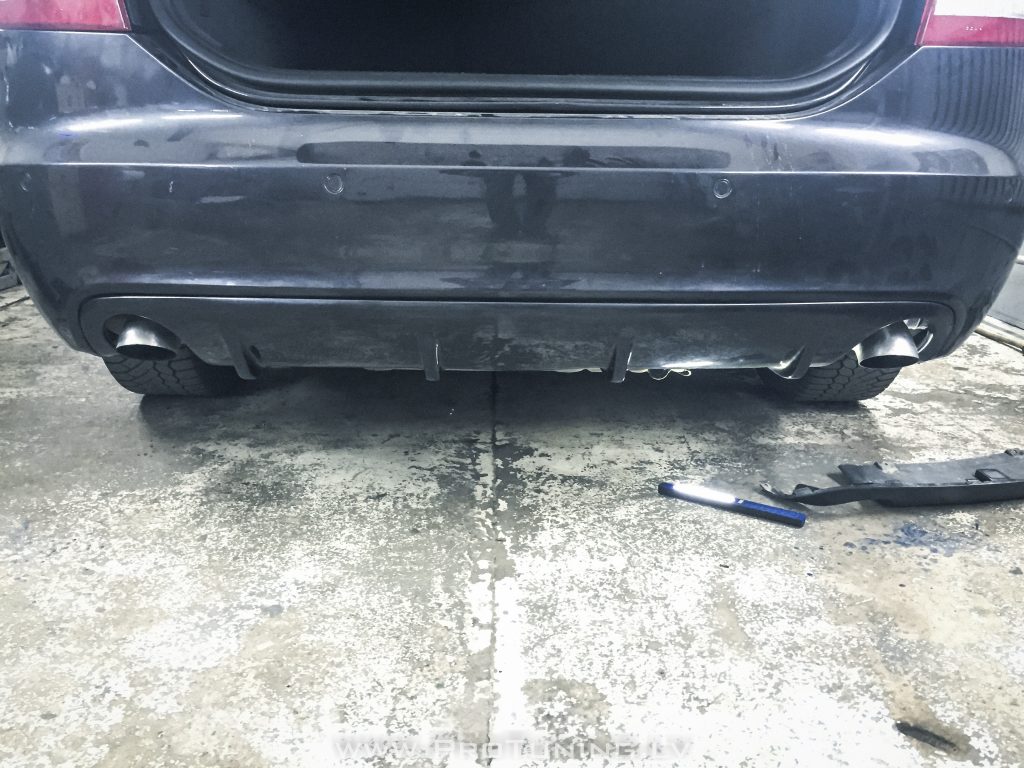
4. Gently push from left side to right side apllying a little force and ask for assistance. One person is holding/pushing diffuser and second one fastens it under the car using existing screws. So you move from left side to opposite side accordingly applying a little pressure to diffuser when screwing it on to car

IMG_6518

5. This is it, fasten other side and enjoy

IMG_6520

BMW E70 Aerodynamic arches flares installation user manual

Sport Arches installation manual on Е70 Х5

Arches can be found here

Arches/flares for BMW X5 E70 2006-2014

For installation you will need:

1) Hands ( two hands and a clean mind )

2) Rivets and a gun for it

3)  Electronic drill to drill correct holes for rivets

1) Remove existing arches, you will destroy 99% of existing rivets, remove the parts of the rivets from the splash guards

2) Do a test fit to find out where to drill the holes for rivets on the new arches


3) Clip in arches, don’t be afraid to apply pressure and force ( stretch the arches – material is elastic enough ). Push the arch inside desired places and fasten it with rivets

 REAR ARCH INSTALLATION VIDEO

ProGym.lv Training Day 020416

ProGym.lv training day with IFBB Athlete Janis Pavkshtello and DJ Gustavito

BMW E53 4.6is bodykit installed

BMW E34 Alpina B10

VLD Garage

Photoshoop for VLD :

Porsche 964

BMW Alpina E34 B10 Bi-Turbo

Acura ( Honda ) NSX


Steyr – Retro classic car by Steyr-Daimler-Puch

Один из немногих оригинальных авто, полностью восстановлен в Латвии


Тигр

Минск

2015

Translate »